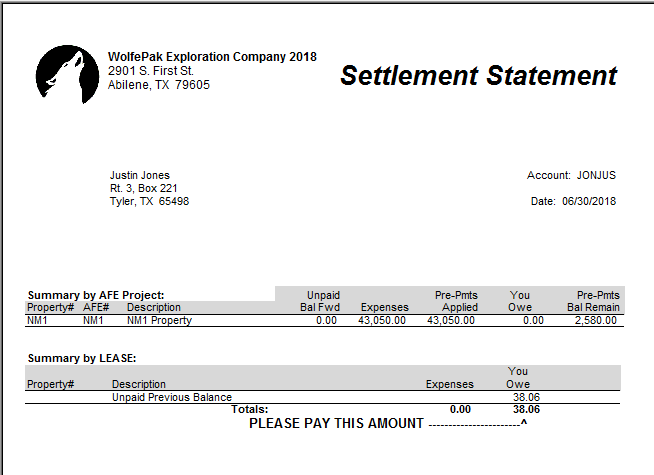
Managing your AFEs (Authorization for Expenditures) can be time consuming and confusing if you don’t have a way to easily set up, apply pre-payments, issue cash calls and manage actual expenses against budgeted amounts.
WolfePak Software gives you the power to streamline this process, which is seamlessly integrated into the WolfePak Revenue/Billing Module. Revenue/Billing allows you to track expenses by AFE and will automatically apply AFE pre-payments to AFE charges during a Billing cycle. AFE’s are set up with a budget amount and as invoices are entered with actual charges reports can be run to show actual costs vs budgeted costs.
So how is this done? Read on for step by step instructions.
Step 1: Log into WolfePak
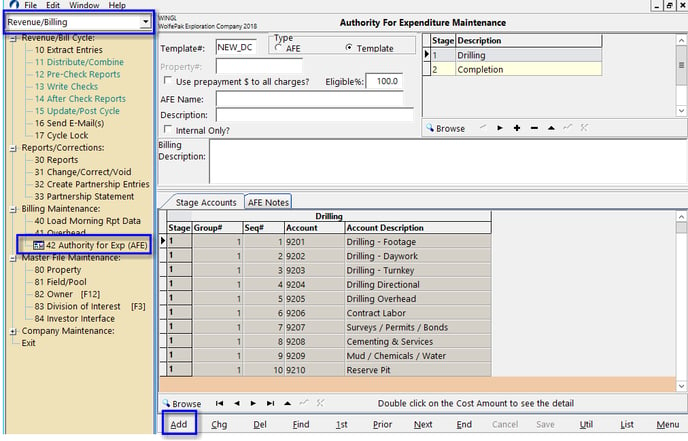
Select the Revenue Billing Module from the top left pull down menu. Then expand Billing Maintenance and select menu item 42 (Authority for Exp – AFE). Click on “Add” at the bottom and select Create New AFE.
Step 2: Create AFE Number & Select Property
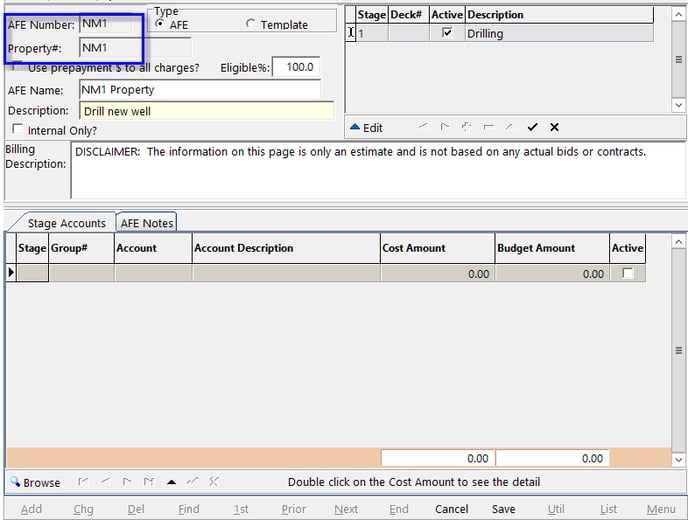
Create an AFE Number and select the Property Name that the AFE is for. On the right hand side add the Deck for Stage 1 and a description if desired. More stages can be added by using the plus sign at the bottom of this section. A billing Description can also be added that will print on owner billing statements. When finished select Save.
Step 3: Adding Accounts
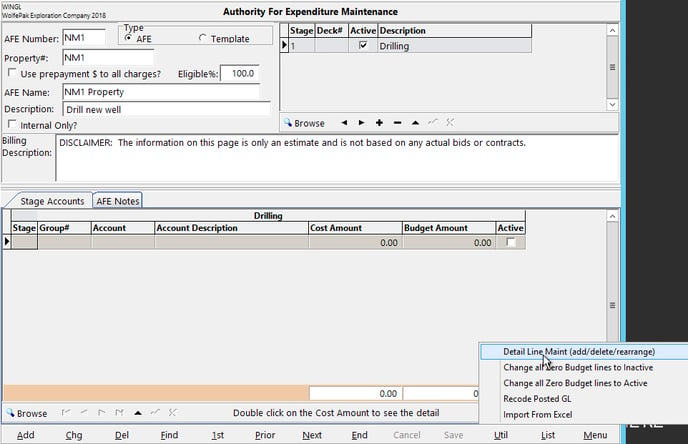
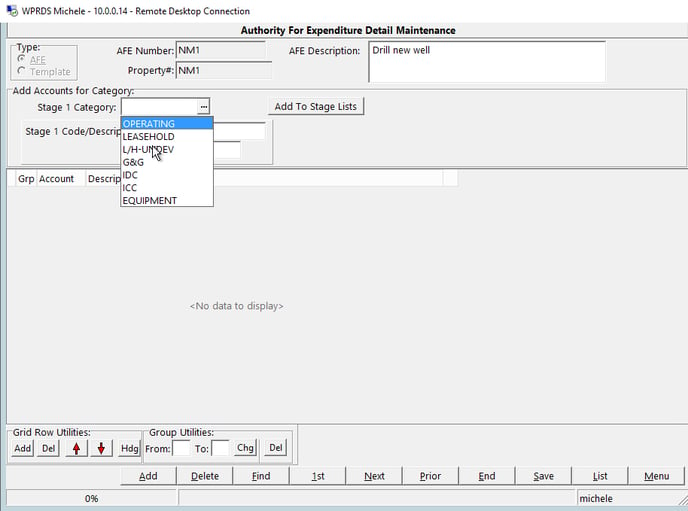
Accounts are added by using the Util button in the lower right hand of the screen and selecting Detail Line Maintenance.
Accounts can be added by category. Just click in the Category box, select the category you want from the drop down and then click the Add to stage lists button. To Add accounts one at a time select the Add button under the Grid Row section and then type in the Account number and Description. Once all accounts have been added Select Save and then Menu out. The accounts are now populated on the AFE.
Step 4: Active AFEs & Cash Calls
At the top of the screen, make sure the Accounts to be used are marked Active and fill in the Budget amounts.

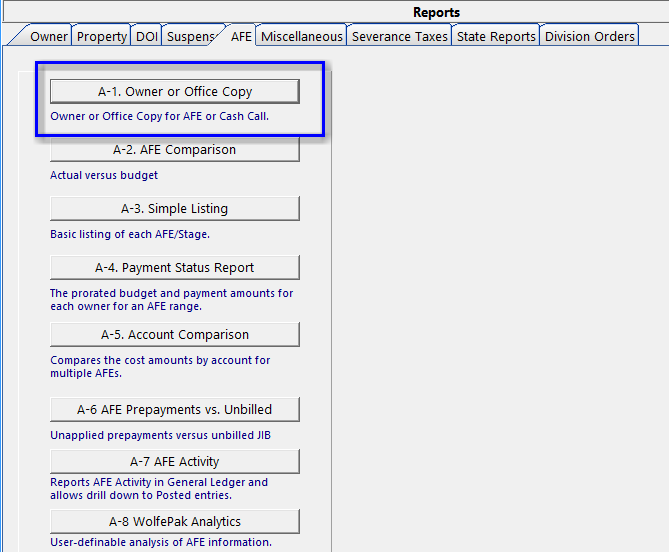
Cash Calls can quickly be sent to owners by selecting the List button (at bottom of screen) and then Selecting Owner or Office Copy.
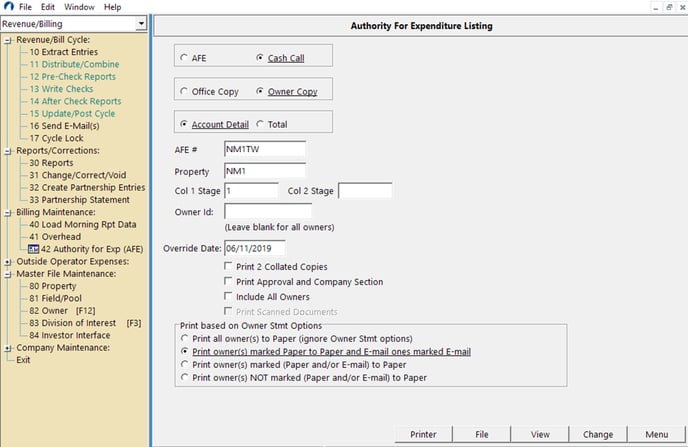
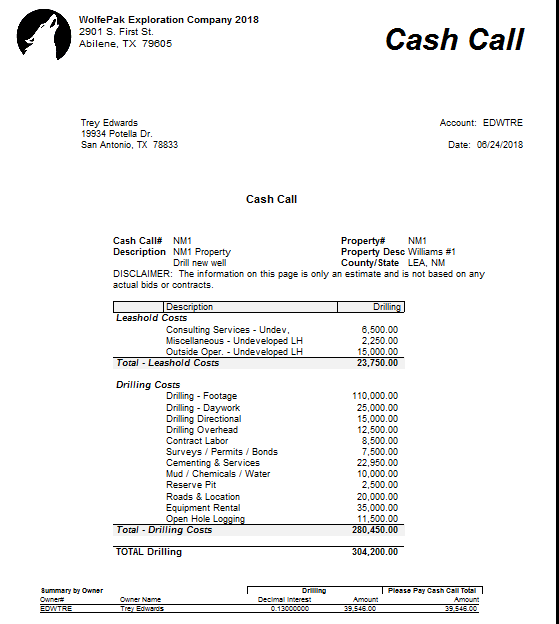
Choose the Cash Call option and the the Owner Copy option. Click View to see Owner AFE portion to print or email per owner’s preference. It will display all AFE costs and the owners share that is due in order to participate.
Sample Cash Call:
Step 5: Updating AFE & Running Reports
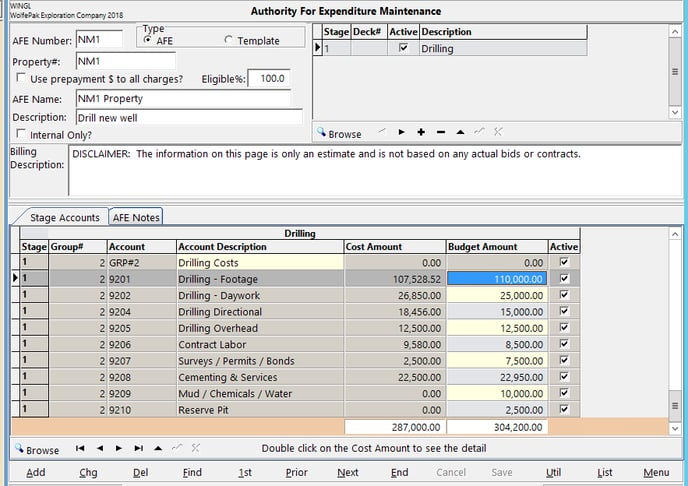
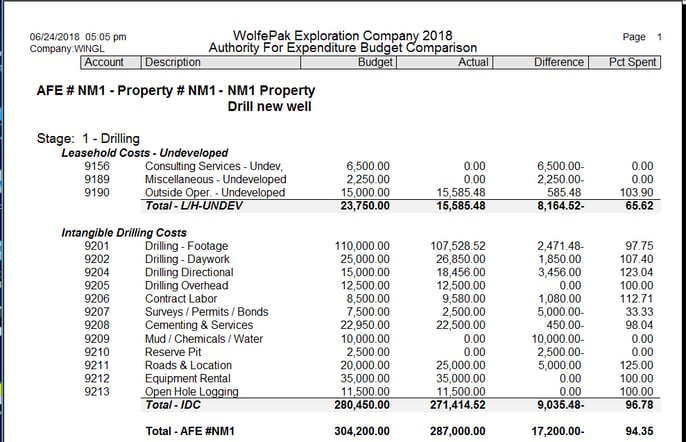
As A/P Invoices are entered and booked to the AFE the Actual costs will display on the AFE as well as the Budgeted amounts for a quick look or run an AFE Comparison to see Budget vs. Actual costs as well as the difference and the % of Budget used.
Costs seen on AFE:
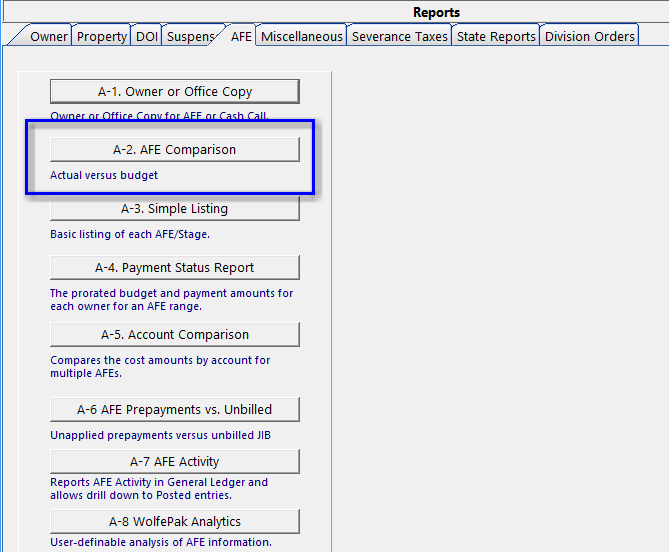
Running AFE Comparison (Click List at bottom of screen)
Sample AFE Comparison Report
GETTING AN OVERVIEW OF PAYMENT STATUS:
As cash call money comes in deposits are booked to an AFE pre-payment account. Reports can be run to show the amount of pre-payments received and still owed.
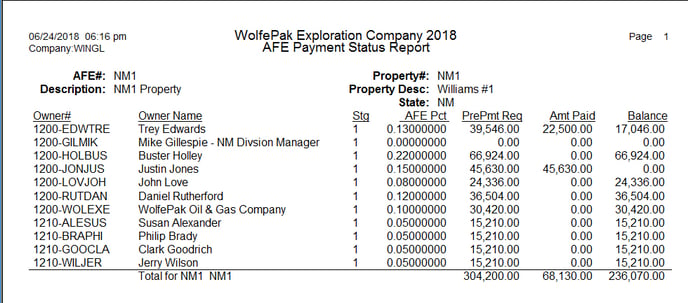
As AFE charges are billed out in a cycle statements show the amount of pre-payment money applied to AFE charges and the pre-payment balance still remaining or the amount owned that pre-payments did not cover if either apply.
